The Bathtub Dilemma: Should Your Boston Bathroom Keep It or Lose It?

The Bathtub Dilemma: Should Your Boston Bathroom Keep It or Lose It? Deciding whether to keep a bathtub is one of the most significant choices in a bathroom remodel, impacting daily life and future resale value. Introduction At Golden Hammer Remodeling, we’ve guided hundreds of Boston-area homeowners through the complexities of bathroom design, and no question comes up more frequently than, “Should I get rid of my bathtub?” From growing families in Winchester needing a practical place to bathe their children to empty-nesters in a Back Bay condo dreaming of a spacious walk-in shower, the answer is never one-size-fits-all. The trend towards luxurious, spa-like showers is strong, yet the practical necessity and perceived resale value of a tub create a genuine dilemma. This decision is especially critical in the Boston market, where bathroom footprints are often constrained by historic architecture. This guide will provide a clear framework for making the right choice for your home, your family, and your future. 1. The Case for the Walk-In Shower: Luxury and Accessibility The primary driver behind tub removal is the desire for a larger, more luxurious shower experience. A spacious walk-in shower with features like a rainfall showerhead, a built-in bench, and frameless glass doors can transform a cramped, utilitarian bathroom into a personal spa. For many of our clients, particularly in smaller city condos, removing a bulky tub-shower combo is the only way to achieve this. Accessibility is another powerful motivator. For homeowners planning to age in place, a curbless or low-threshold walk-in shower is a near necessity. It eliminates the hazard of stepping over a high tub wall, a common site of household accidents. We’ve completed numerous projects in neighborhoods like Belmont and Wellesley where the primary goal was creating a safe, stylish, and future-proof bathroom for homeowners who intend to stay in their homes for decades to come. 2. The Argument for Keeping a Tub: Resale Value and Family Needs The most common reason homeowners hesitate to remove their only bathtub is resale value. The long-standing advice from real estate agents is that a home needs at least one bathtub to appeal to the widest range of potential buyers, especially families with young children. While the market is shifting, this still holds true in many of Boston’s family-oriented suburbs. If you plan to sell your home within the next five years, and it’s the only full bathroom, removing the tub could be a financial misstep. The second major consideration is your own family’s needs. If you have young children, or plan to, a bathtub is practically indispensable. Likewise, many people simply enjoy a relaxing soak. Before you commit to a tub-free life, be honest about your habits. If a weekly bath is your go-to method for de-stressing, you will regret its absence, no matter how beautiful your new shower is. 3. The Hybrid Solution: When You Can Have It All For those with enough space, the ideal solution is often a separate tub and shower. This allows for a no-compromise, luxurious walk-in shower while retaining the practical and relaxation benefits of a bathtub. In larger master bathroom renovations, this is the most requested configuration. Freestanding tubs are particularly popular, serving as a stunning sculptural centerpiece for the room. However, in many Boston homes, space is a luxury. In these cases, a high-quality tub-shower combination is often the best choice. Modern alcove tubs are deeper and more comfortable than older models, and when paired with elegant tile and high-end glass doors, they can feel far from a compromise. Here is a simple decision framework: Your Situation Our Recommendation Reasoning Primary bathroom in a condo Lean towards Walk-in Shower Maximizes space and luxury for the primary user. Only full bathroom in a suburban home Strongly consider keeping a Tub Protects resale value for families. Have another bathroom with a tub Feel free to choose a Walk-in Shower You have the best of both worlds. Planning to age in place Strongly consider a Walk-in Shower Safety and accessibility are paramount. 4. The Boston Market Reality: What Local Real Estate Agents Are Seeing The Boston real estate market has its own unique characteristics that influence the tub-versus-shower decision. We’ve consulted with numerous local real estate agents who work in neighborhoods from Cambridge to Concord, and the consensus is nuanced. In urban condos and apartments, particularly in areas like South Boston, the North End, and downtown Boston, the lack of a bathtub is rarely a deal-breaker. Buyers in these markets tend to be young professionals or couples without children who prioritize modern, spa-like amenities. However, in the family-oriented suburbs—Newton, Lexington, Winchester, Wellesley, and Woburn—the story is different. Homes in these areas are primarily marketed to families, and the presence of at least one bathtub is still considered essential by most agents. If your home has multiple bathrooms, you have much more flexibility. Converting a master bathroom to a luxurious walk-in shower while keeping a tub in a secondary bathroom is often the ideal compromise. This approach allows you to enjoy the spa experience you crave while maintaining the broad market appeal that protects your investment. 5. Design Considerations: Making the Most of Your Choice Once you’ve decided whether to keep or remove your bathtub, the next step is to design the space to maximize both function and beauty. If you’re opting for a walk-in shower, consider incorporating features that enhance the experience. A built-in bench is not only practical for shaving or simply relaxing under the water, but it’s also a critical safety feature for aging in place. Multiple showerheads—a rainfall head overhead and a handheld wand—provide a customizable experience. Frameless glass enclosures create a sleek, open look that makes even a small bathroom feel more spacious. If you’re keeping or installing a bathtub, don’t settle for a basic builder-grade model. Modern alcove tubs are available in deeper, more ergonomic designs that make bathing a true pleasure. Freestanding tubs, while requiring more space, serve as a stunning focal point and come in a
Boston Bathroom Renovations: The Hidden Costs Nobody Talks About
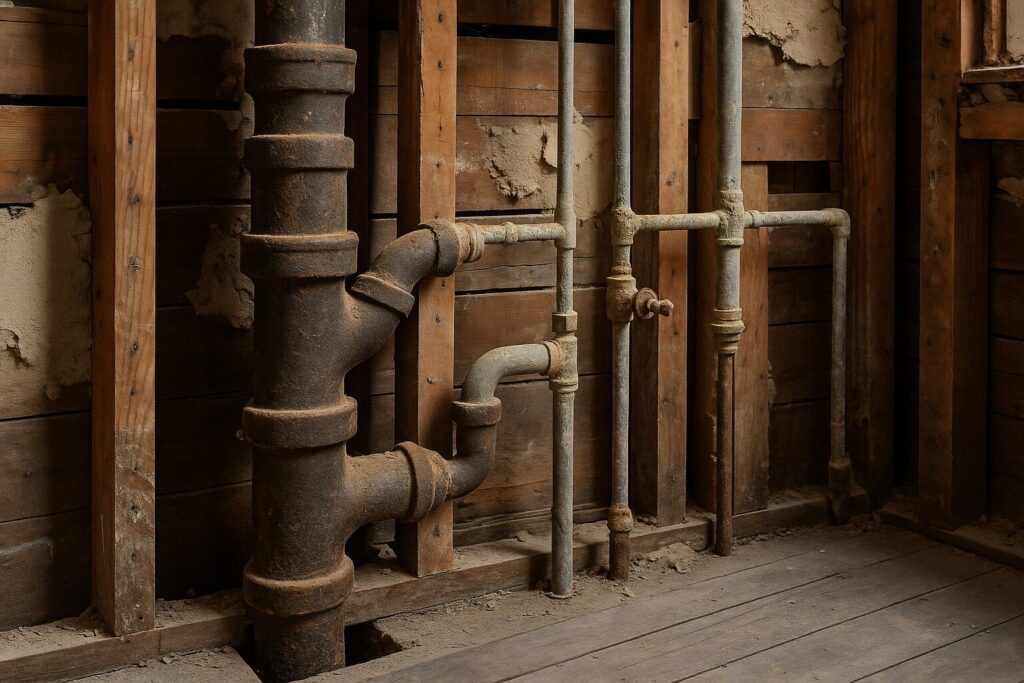
Boston Bathroom Renovations: The Hidden Costs Nobody Talks About Understanding the real expenses behind bathroom remodeling in historic New England homes can save you thousands in unexpected charges. Introduction At Golden Hammer Remodeling, we believe in transparency throughout the renovation process, especially when it comes to budgeting for bathroom projects in Boston’s historic housing stock. After completing hundreds of bathroom renovations from Back Bay brownstones to Cambridge triple-deckers, we’ve identified several cost factors that consistently surprise homeowners during the renovation process. These aren’t the obvious expenses like fixtures and finishes that appear in every renovation estimate. Instead, they’re the hidden infrastructure challenges that emerge once walls are opened and the true condition of a home’s mechanical systems becomes apparent. Understanding these potential costs upfront allows homeowners to budget appropriately and make informed decisions about their renovation scope. This guide explores the most common hidden expenses we encounter in Boston bathroom renovations, along with strategies for minimizing their impact on your project timeline and budget. 1. The Plumbing Reality: When Original Systems Meet Modern Expectations The most significant hidden cost in Boston bathroom renovations typically involves plumbing upgrades that become necessary once existing systems are exposed. Many homes in our service area were built between 1890 and 1940, when plumbing standards and materials were vastly different from today’s requirements. Cast iron drain lines, common in homes built before 1960, often appear functional until renovation work begins. However, these pipes frequently have internal corrosion that restricts water flow, even when external appearance suggests they’re in good condition. We’ve encountered situations where homeowners planned simple fixture updates but discovered that their drain lines needed complete replacement to accommodate modern low-flow toilets and high-efficiency fixtures. The cost implications can be substantial. Replacing a cast iron drain stack typically ranges from $3,000 to $8,000, depending on accessibility and the extent of replacement needed. In multi-story homes, this work often requires opening walls in multiple rooms to access the full length of the stack. We always recommend having a plumbing assessment conducted before finalizing renovation plans, particularly in homes built before 1950. Water supply lines present similar challenges. Original galvanized steel pipes, while often still functional, may have reduced internal diameter due to mineral buildup. This can result in poor water pressure to new fixtures, particularly in second-floor bathrooms. Upgrading to modern copper or PEX piping typically adds $2,000 to $5,000 to a bathroom renovation, but the improvement in water pressure and long-term reliability usually justifies the investment. 2. Electrical Upgrades: Meeting Modern Safety Standards Electrical work represents another significant hidden cost category, particularly in homes with original wiring systems. Many Boston-area homes built before 1940 still have knob-and-tube wiring, which, while not inherently dangerous when properly maintained, doesn’t meet current electrical codes for bathroom installations. Modern bathroom electrical requirements include GFCI protection for all outlets, dedicated circuits for high-draw appliances like heated floors or ventilation fans, and proper grounding for all fixtures. Homes with knob-and-tube wiring lack the grounding conductors required for these safety features. Upgrading bathroom electrical systems in these homes typically requires running new circuits from the main panel, which can add $2,000 to $4,000 to renovation costs. We’ve also encountered situations where existing electrical panels lack sufficient capacity for modern bathroom amenities. Adding heated floors, multiple high-wattage light fixtures, and powerful ventilation fans can exceed the capacity of older electrical services. Panel upgrades, while not always necessary, can add $3,000 to $6,000 to project costs when required. 3. Structural Surprises: The Foundation of Renovation Challenges Structural issues represent perhaps the most unpredictable category of hidden costs. Boston’s historic homes were built using construction methods and materials that differ significantly from modern standards. When bathroom renovations involve moving walls or changing floor plans, structural considerations often emerge.Floor joist modifications frequently become necessary when installing modern fixtures in locations that weren’t originally designed for plumbing. Moving a toilet, for example, may require cutting floor joists to accommodate new drain lines. This work requires careful engineering to maintain structural integrity and typically adds $1,500 to $3,000 to renovation costs.We’ve also encountered situations where bathroom floors have suffered water damage over decades, compromising the structural integrity of subflooring and even floor joists. This damage isn’t always visible until flooring is removed, but it must be addressed before new finishes can be installed. Subfloor replacement typically ranges from $800 to $2,500, depending on the extent of damage and accessibility. 4. The Ventilation Challenge: Addressing Moisture Control in Historic Homes Proper ventilation represents a critical but often overlooked aspect of bathroom renovations in historic homes. Many older homes lack adequate bathroom ventilation, relying instead on windows for moisture control. While this approach worked when homes were less tightly sealed, modern renovation practices require mechanical ventilation to prevent moisture-related problems. Installing new ventilation systems in historic homes often requires creative routing solutions. Unlike new construction, where ductwork can be planned during the framing stage, retrofit installations must work around existing structural elements. We frequently encounter situations where the most direct route for exhaust ducting is blocked by structural beams or existing mechanical systems. The cost of adding proper ventilation typically ranges from $800 to $2,500, depending on the complexity of the installation. However, this investment is crucial for preventing future moisture damage that could cost thousands to repair. We always include ventilation upgrades in our renovation recommendations, even when clients initially plan to rely on existing windows. 5. Hazardous Materials: The Legacy of Historic Construction Homes built before 1978 may contain lead paint and asbestos-containing materials, both of which require special handling during renovation work. While not every project encounters these materials, their presence can significantly impact renovation timelines and costs. Lead paint is particularly common in bathrooms of homes built before 1950, often found in multiple layers beneath more recent paint applications. When lead paint must be disturbed during renovation work, EPA regulations require specific containment and disposal procedures. These requirements can add $1,500 to $4,000 to renovation costs, depending on the extent of lead paint present.
The $50,000 Mistake We See in Every Back Bay Kitchen (And How to Avoid It)
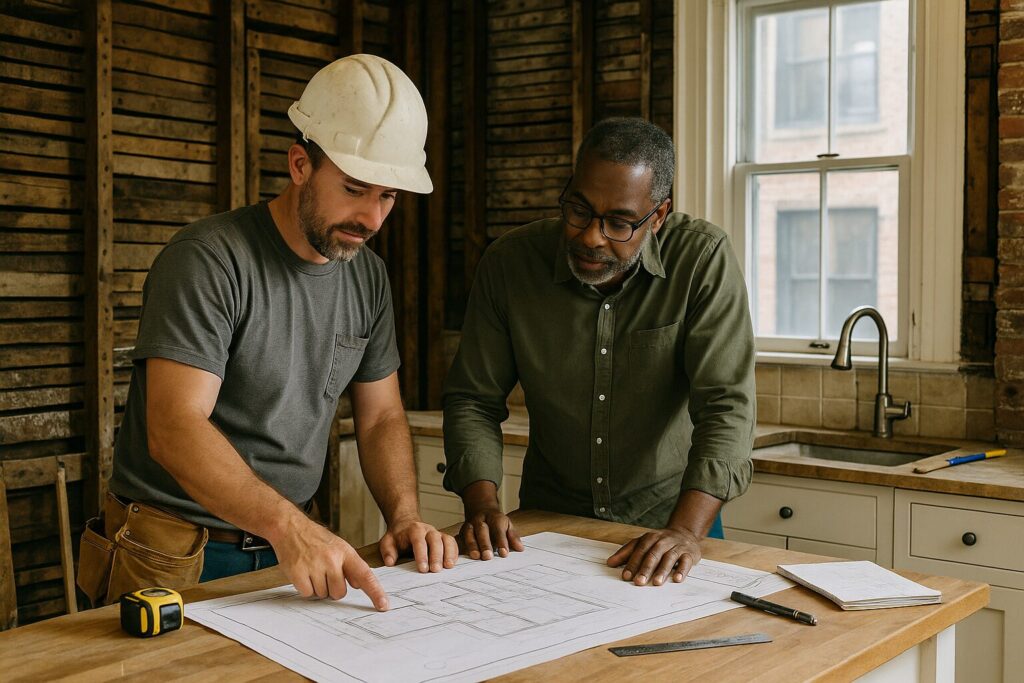
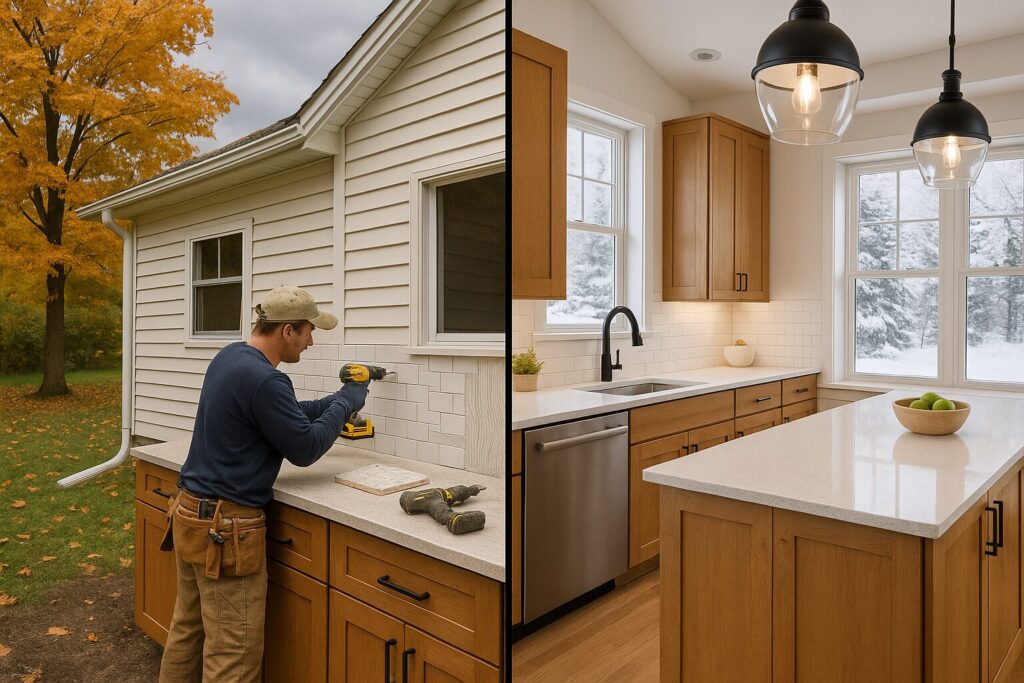
The $50,000 Mistake We See in Every Back Bay Kitchen (And How to Avoid It) Introduction At Golden Hammer Remodeling, we’ve spent years transforming kitchens across Boston’s most iconic neighborhoods, from the grand brownstones of Back Bay to the historic colonials of Lexington. We’ve seen it all, but there’s one costly mistake we see homeowners make again and again, particularly in historic homes. It’s a mistake that doesn’t show up on Instagram or Pinterest, but it can quietly add $50,000 or more to a renovation budget, turning a dream project into a financial nightmare. This isn’t about choosing the wrong color cabinets or a trendy backsplash that will soon be dated. This is about a fundamental misunderstanding of what it takes to renovate a home that has stood for over a century. This guide will expose this common pitfall and give you the insider knowledge to avoid it, ensuring your kitchen remodel is a sound investment, not a costly lesson. 1. The Allure of the Aesthetic: The Mistake in Plain Sight The mistake is simple: falling in love with an aesthetic without understanding the architecture. Homeowners spend months curating their dream kitchen from glossy magazines and social media feeds, filled with images of sleek, open-concept spaces. They present these images to their contractor, expecting a straightforward execution. The problem? The kitchens in those images were likely built in new-construction homes in Texas or California, not in a 19th-century Boston brownstone. The hidden infrastructure of a historic home—the plumbing, the electrical, the structural beams—is a world away from that of a modern build. Forcing a modern aesthetic onto a historic frame without proper planning is where the costs spiral out of control. 2. The $50,000 Snowball: How Costs Escalate So, how does this initial oversight turn into a $50,000 problem? It’s a domino effect: 1.The Wall Comes Down: You want that open-concept kitchen, so you decide to remove a wall between the kitchen and dining room. But in a Back Bay brownstone, that wall is likely plaster and lathe, not drywall, and it’s almost certainly load-bearing. This requires a structural engineer, a massive steel beam, and extensive reinforcement of the surrounding structure. Cost: $15,000 – $25,000 2.The Plumbing Predicament: You want to move the sink to the new island. But the original cast-iron plumbing stack is located in that wall you just removed. Now, you have to re-route the plumbing, which may involve cutting into the ceiling of the unit below you (if you’re in a condo) or trenching through the original hardwood floors. Cost: $10,000 – $15,000 3.The Electrical Enigma: Your new kitchen design includes a dozen recessed lights, under-cabinet lighting, and a suite of high-end appliances. But your home’s electrical system is still knob-and-tube. A full electrical upgrade is now required, not just for the kitchen but for the entire home to meet modern code. Cost: $15,000 – $20,000 Suddenly, your cosmetic kitchen remodel has become a full-blown gut renovation, and you’ve blown past your budget before a single cabinet has been installed. 3. The Golden Hammer Solution: A Proactive, Architecture-First Approach How do you avoid this costly mistake? By flipping the script. Instead of starting with the aesthetic, start with the architecture. At Golden Hammer Remodeling, we employ an “architecture-first” approach to all our historic home renovations.• Comprehensive Initial Assessment: Before we even talk about cabinet styles, we conduct a thorough investigation of your home’s existing conditions. This includes a structural assessment, a plumbing and electrical evaluation, and a hazardous materials survey (for things like asbestos and lead paint).• Design with the Home, Not Against It: We design a kitchen that works with the unique character and constraints of your home, not against them. This doesn’t mean you can’t have a modern kitchen. It means we find creative solutions to achieve a modern aesthetic while respecting the home’s historic integrity.• Budget for the Bones: We allocate a portion of the budget specifically for infrastructure upgrades. This way, there are no surprises, and you can make informed decisions about where to invest your money. 4. Case Study: A Tale of Two Kitchens Consider two recent projects. One, a homeowner in Newton, came to us with a picture of a minimalist, all-white kitchen. Their 1920s colonial had a small, closed-off kitchen. Instead of removing walls, we widened the doorways and used glass pocket doors to create a sense of openness without major structural changes. We kept the sink in its original location, saving thousands in plumbing costs, and invested in high-end, period-appropriate fixtures that celebrated the home’s character. The result was a stunning, functional kitchen that respected the home’s history and stayed on budget. Another homeowner, in a South End condo, was adamant about removing a wall. Our initial assessment revealed that the wall contained the main plumbing stack for the entire building. We were able to work with the condo association and a team of engineers to re-route the plumbing, but it added a significant cost to the project. Because we identified this issue upfront, the homeowner was able to make an informed decision and adjust their budget accordingly. There were no surprises, and the final result was exactly what they wanted. Ready to Renovate the Right Way? If you’re considering a kitchen remodel in a historic Boston home, don’t let your dream turn into a financial nightmare. Contact Golden Hammer Remodeling today for a consultation. Our architecture-first approach will ensure that your new kitchen is a beautiful, functional, and sound investment that you’ll enjoy for years to come. Frequently Asked Questions (FAQ) 1. Can I still have an open-concept kitchen in a historic home? Yes, but it requires careful planning. We can help you determine if it’s feasible and what the structural and budgetary implications will be. 2. How do I know if my home has knob-and-tube wiring? If your home was built before 1940, there’s a good chance it has knob-and-tube wiring. We can perform an electrical inspection to confirm. 3. Is it
Sustainable Kitchen Remodeling: Eco-Friendly Choices for Environmentally Conscious Boston Homeowners
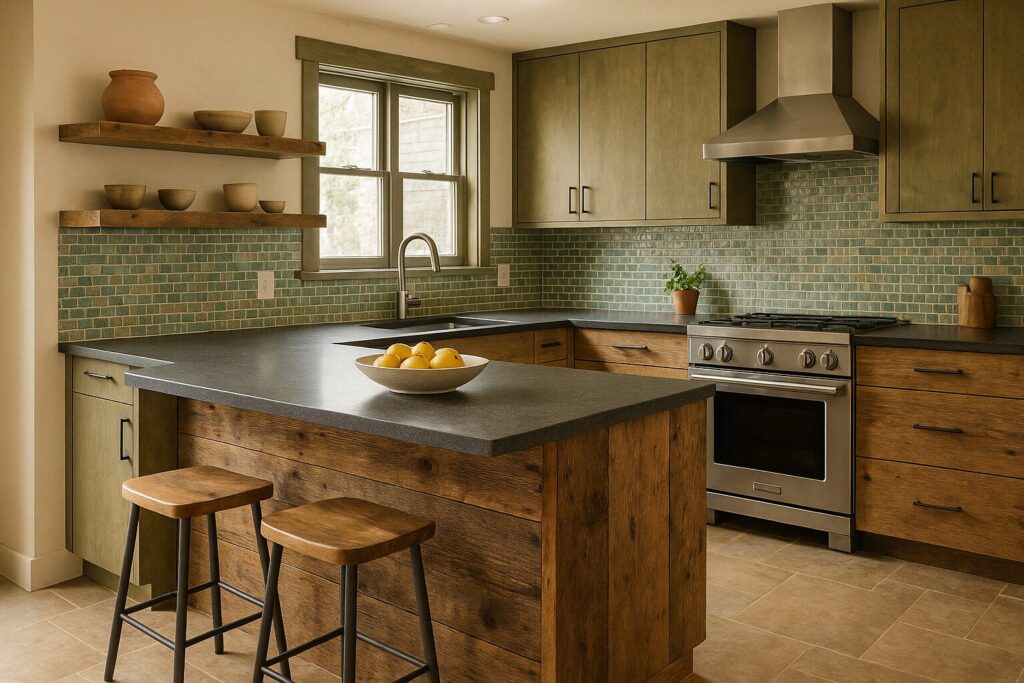
Sustainable Kitchen Remodeling: Eco-Friendly Choices for Environmentally Conscious Boston Homeowners Introduction Create a beautiful, functional kitchen that reduces your environmental impact while providing long-term cost savings through sustainable materials and energy-efficient design choices. At Golden Hammer Remodeling, we’ve witnessed a significant shift among Boston homeowners toward environmentally responsible renovation choices that align with both personal values and long-term financial benefits. Throughout Newton, Lexington, and the broader Boston metro area, families are increasingly seeking kitchen renovations that minimize environmental impact while maximizing functionality, beauty, and home value. Sustainable kitchen remodeling encompasses far more than simply choosing recycled materials – it involves a comprehensive approach to design, material selection, energy efficiency, and waste reduction that creates healthier living environments while reducing utility costs and environmental footprint. The most successful sustainable kitchen projects balance environmental responsibility with practical functionality, resulting in spaces that serve families beautifully while supporting broader environmental goals. Modern sustainable materials and technologies have evolved to offer performance and aesthetics that rival or exceed traditional options, making eco-friendly kitchen renovation an increasingly attractive choice for discerning homeowners who refuse to compromise on quality or style in pursuit of environmental responsibility. 1. Sustainable Cabinet Materials and Construction Kitchen cabinets represent the largest material investment in most kitchen renovations, making cabinet material selection crucial for environmentally conscious homeowners seeking to minimize their renovation’s environmental impact while ensuring long-term durability and beauty. Formaldehyde-free and low-VOC cabinet materials have revolutionized sustainable kitchen design by eliminating harmful chemical emissions that can affect indoor air quality for years after installation. Traditional particleboard and MDF cabinets often contain formaldehyde-based adhesives that continue releasing volatile organic compounds long after installation, but modern alternatives use safer binding agents that maintain structural integrity without compromising indoor air quality. At Golden Hammer Remodeling, we source cabinets constructed with formaldehyde-free cores and low-VOC finishes that meet strict environmental standards while providing the durability and beauty our clients expect from premium kitchen cabinetry. Reclaimed and recycled wood options provide stunning aesthetic appeal while giving new life to materials that might otherwise end up in landfills. Reclaimed barn wood, salvaged from historic New England structures, offers unique character and patina that cannot be replicated in new materials. These reclaimed materials often feature superior grain patterns and density compared to modern lumber, having been harvested from old-growth forests decades or centuries ago. Recycled wood products, manufactured from post-consumer waste wood, provide consistent quality and appearance while diverting waste from landfills and reducing demand for virgin timber harvesting. FSC-certified wood ensures that new wood products come from responsibly managed forests that maintain biodiversity, protect indigenous communities, and support sustainable harvesting practices. The Forest Stewardship Council certification provides third-party verification that wood products meet strict environmental and social standards throughout the supply chain. FSC-certified cabinet materials are widely available in popular species like maple, oak, and cherry, allowing homeowners to choose sustainable options without compromising on preferred aesthetics or functionality. Bamboo cabinetry represents an innovative sustainable option that grows rapidly and regenerates without replanting, making it one of the most renewable cabinet materials available. Modern bamboo cabinet construction techniques produce materials with strength and durability comparable to traditional hardwoods, while bamboo’s natural antimicrobial properties provide additional benefits in kitchen environments. The light, consistent grain pattern of bamboo complements both traditional and contemporary kitchen designs, offering versatility that works well with various aesthetic preferences. 2. Energy-Efficient Appliances and Systems Modern energy-efficient appliances significantly reduce both environmental impact and long-term operating costs, making them essential components of sustainable kitchen renovations that provide immediate and ongoing benefits to environmentally conscious homeowners. ENERGY STAR certified appliances meet strict efficiency guidelines set by the Environmental Protection Agency, using 10-50% less energy than standard models while maintaining superior performance. These appliances reduce greenhouse gas emissions and utility costs while often providing enhanced features and reliability compared to less efficient alternatives. At Golden Hammer Remodeling, we help clients select ENERGY STAR appliances that match their cooking habits and family needs while maximizing energy savings and environmental benefits. Induction cooktops represent the most energy-efficient cooking technology available, transferring energy directly to cookware rather than heating surrounding air like gas or traditional electric ranges. This direct energy transfer results in faster cooking times, more precise temperature control, and significantly reduced energy consumption compared to conventional cooking methods. Induction technology also improves kitchen air quality by eliminating combustion byproducts associated with gas cooking, creating healthier indoor environments while reducing energy costs. High-efficiency refrigeration technology has advanced dramatically in recent years, with modern refrigerators using 75% less energy than models from the 1970s while providing larger capacity and enhanced features. Variable-speed compressors, improved insulation, and smart temperature management systems maintain optimal food storage conditions while minimizing energy consumption. Many modern refrigerators also feature advanced water filtration systems that reduce reliance on bottled water, further supporting environmental goals. Smart appliance integration allows for optimized energy usage through automated scheduling and monitoring that reduces consumption during peak demand periods. Smart dishwashers can delay operation until off-peak hours when electricity rates are lower and grid demand is reduced. Smart ovens can preheat efficiently and maintain precise temperatures while using minimal energy. These intelligent systems often provide usage monitoring that helps homeowners understand and optimize their energy consumption patterns. 3. Sustainable Countertop and Flooring Options Countertop and flooring selections significantly impact both the environmental footprint and long-term performance of sustainable kitchen renovations, with modern eco-friendly options providing beauty and durability that rival traditional materials. Recycled glass countertops transform post-consumer glass waste into stunning surfaces that offer unique aesthetic appeal while diverting waste from landfills. These surfaces incorporate recycled glass from bottles, windows, and other sources into durable composite materials that resist stains, scratches, and heat while requiring minimal maintenance. The variety of available colors and patterns allows for customized designs that complement any kitchen aesthetic, from contemporary to traditional styles. Recycled paper composite countertops, made from post-consumer paper waste and non-petroleum-based resins, provide warm, natural-looking surfaces with excellent durability and workability. These materials can be cut, shaped, and finished like traditional wood surfaces
Maximizing Small Bathrooms: Smart Design Solutions for Boston’s Compact Spaces
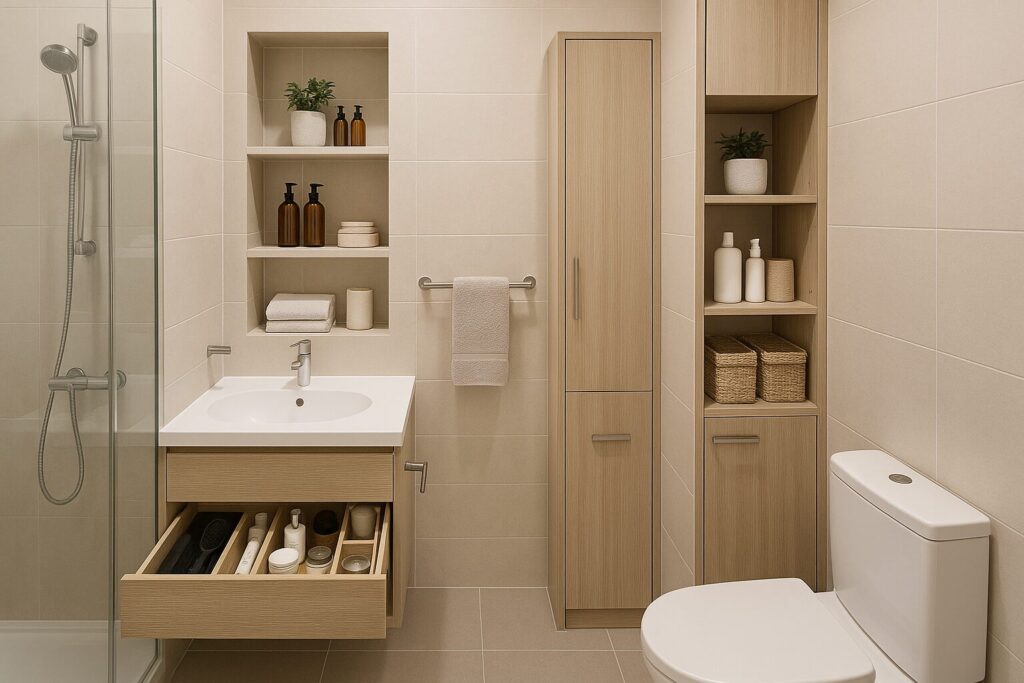
Maximizing Small Bathrooms: Smart Design Solutions for Boston’s Compact Spaces Introduction Transform your cramped bathroom into a functional, beautiful space that feels twice its actual size through strategic design choices and clever space optimization techniques. At Golden Hammer Remodeling, we encounter countless small bathrooms throughout Boston’s historic neighborhoods, from the narrow powder rooms of Back Bay brownstones to the compact bathrooms of Cambridge triple-deckers. These space constraints, common in homes built before modern bathroom standards, present unique challenges that require creative solutions and expert planning. However, our extensive experience renovating small bathrooms in Newton, Lexington, and throughout the Boston metro area has taught us that size limitations don’t have to mean sacrificing style, functionality, or comfort. The key lies in understanding how to maximize every square inch through strategic layout planning, smart storage solutions, and design techniques that create the illusion of spaciousness. With thoughtful planning and expert execution, even the smallest bathroom can become a beautiful, highly functional space that serves your family’s needs while adding significant value to your home. The most successful small bathroom renovations combine practical storage solutions with visual tricks that make spaces feel larger and more luxurious than their actual dimensions suggest. 1. Strategic Layout Optimization for Maximum Functionality The foundation of any successful small bathroom renovation lies in optimizing the layout to maximize both functionality and the perception of space. In Boston’s older homes, many bathrooms were designed when indoor plumbing was still relatively new, resulting in awkward layouts that don’t serve modern family needs effectively. Fixture placement represents the most critical aspect of small bathroom layout optimization. Traditional bathroom layouts often position fixtures without considering traffic flow or visual impact, but strategic repositioning can dramatically improve both functionality and spaciousness. At Golden Hammer Remodeling, we frequently recommend relocating toilets to corners or alcoves, which frees up central floor space and creates better traffic flow. This repositioning often allows for larger vanities or more comfortable shower access while maintaining all necessary clearances required by building codes. The shower versus bathtub decision significantly impacts small bathroom functionality and perceived size. While many homeowners assume they must sacrifice bathing options in small spaces, creative solutions can accommodate both preferences. Corner showers with neo-angle doors maximize floor space while providing comfortable showering areas. Alternatively, shower-tub combinations can work effectively when properly planned, particularly with sliding doors that don’t require swing clearance. For families who rarely use bathtubs, eliminating the tub entirely and installing a spacious walk-in shower can transform a cramped bathroom into a spa-like retreat. Vanity selection and positioning dramatically affect both storage capacity and visual flow in small bathrooms. Wall-mounted vanities create the illusion of more floor space by exposing flooring underneath, while also providing practical storage without overwhelming the room. The height and depth of vanities must be carefully considered – deeper vanities provide more storage but can make narrow bathrooms feel cramped, while shallower profiles maintain better traffic flow. Custom vanity solutions often provide the best balance of storage and space efficiency in challenging small bathroom layouts. 2. Storage Solutions That Don’t Compromise Style Effective storage represents one of the greatest challenges in small bathroom design, but innovative solutions can provide ample storage without cluttering the visual space or compromising the room’s aesthetic appeal. Vertical storage maximization takes advantage of often-underutilized wall space above eye level. Tall, narrow cabinets that extend toward the ceiling provide substantial storage for linens, toiletries, and cleaning supplies while maintaining a minimal footprint. Built-in niches within shower areas eliminate the need for bulky caddies while providing convenient storage for bathing essentials. These recessed storage areas can be beautifully finished with matching tile or contrasting materials that add visual interest without consuming precious floor space. Multi-functional fixtures serve double duty in small bathrooms where every element must justify its space consumption. Vanity mirrors with integrated storage compartments provide essential grooming space while concealing toiletries and medications. Medicine cabinets with interior electrical outlets accommodate electric toothbrushes and other small appliances without cluttering countertops. Toilet paper holders with integrated storage shelves, towel bars with built-in hooks, and shower fixtures with storage capabilities all contribute to a more organized, functional bathroom without adding visual clutter. Hidden storage opportunities exist throughout small bathrooms for homeowners willing to think creatively about space utilization. The area above doorways can accommodate narrow shelving for infrequently used items. Toe-kick drawers beneath vanities provide storage for flat items like scales or cleaning supplies. Behind-toilet storage units take advantage of otherwise wasted space while providing substantial storage capacity. These hidden storage solutions maintain clean sight lines while dramatically increasing the bathroom’s organizational capacity. 3. Visual Tricks That Create Spacious Illusions The perception of space often matters more than actual square footage in small bathroom design. Strategic use of color, lighting, and materials can make compact bathrooms feel significantly larger and more luxurious than their actual dimensions.Color psychology plays a crucial role in small bathroom design, with light colors reflecting more light and creating the illusion of expanded space. However, this doesn’t mean small bathrooms must be stark white. Soft, neutral tones like warm grays, pale blues, or creamy whites provide visual expansion while maintaining personality and warmth. Monochromatic color schemes, where walls, fixtures, and accessories share similar tones, create visual continuity that makes spaces feel larger. Strategic use of darker accent colors can add depth and interest without overwhelming the space when applied thoughtfully to single accent walls or design elements.Mirror placement and sizing dramatically impact perceived bathroom size, with properly positioned mirrors effectively doubling the visual space. Large mirrors that extend across entire vanity walls create the strongest expansion effect, while multiple mirrors can add visual interest while still providing spacious illusions. Mirrors positioned to reflect windows or light sources amplify natural light throughout the space. Mirrored cabinet doors serve dual purposes by providing storage while contributing to the room’s sense of spaciousness.Lighting design significantly affects how spacious small bathrooms feel, with layered lighting creating depth and eliminating shadows that can make spaces feel cramped.
Fall Remodeling in Boston: The Perfect Season to Transform Your Home Before Winter
Creating Your Dream Spa Bathroom: Luxury Features That Transform Your Daily Routine Introduction Take advantage of fall’s ideal conditions and contractor availability to complete your kitchen or bathroom renovation before winter arrives, ensuring your family enjoys beautiful new spaces throughout the colder months. At Golden Hammer Remodeling, we’ve discovered that fall represents the optimal season for kitchen and bathroom renovations throughout Boston, Newton, and Lexington. While many homeowners postpone major remodeling projects until spring, our extensive experience in the Boston metro area has shown us that fall offers unique advantages that make it the perfect time to transform your home. The moderate temperatures, reduced humidity, and stable weather patterns of New England autumns create ideal conditions for interior renovations, while the approaching winter season provides strong motivation to complete projects before the holidays and cold weather arrive. Fall remodeling allows families to enjoy their beautiful new kitchens during holiday entertaining season and provides the comfort of updated bathrooms throughout the long New England winter. Additionally, contractors often have greater availability after the busy summer season, material deliveries proceed smoothly without weather delays, and completing projects in fall means your home is ready to showcase increased value when the spring real estate market becomes active. The strategic timing of fall renovations maximizes both immediate enjoyment and long-term investment returns. 1. Why Fall is the Ideal Season for Boston Remodeling Fall weather conditions in New England provide the perfect environment for interior renovation projects, offering stability and comfort that other seasons cannot match. The moderate temperatures and low humidity levels of autumn create optimal conditions for material installation, paint curing, and the detailed finish work that defines quality renovations. Temperature stability during fall months eliminates the extreme heat and humidity of summer that can complicate material installation and extend drying times for paints, stains, and adhesives. The comfortable working conditions of fall also mean that contractors can maintain consistent productivity without the heat-related slowdowns common during summer projects. Additionally, fall’s moderate temperatures allow for better ventilation during renovation work without the energy costs associated with heating or cooling that would be necessary during winter or summer projects. Contractor availability reaches optimal levels during fall as the busy summer construction season winds down and contractors have more flexibility in their schedules. At Golden Hammer Remodeling, we find that our fall clients often enjoy more personalized attention from our craftsmen and greater flexibility in project scheduling. This increased availability doesn’t mean compromising on quality – it means accessing our best teams when they can dedicate focused attention to your project without the scheduling pressures of peak season. Material delivery and storage become significantly easier during fall months when weather conditions are predictable and mild. Unlike summer’s thunderstorms or winter’s snow and ice, fall provides consistent conditions for receiving large deliveries like cabinets, countertops, and appliances. The stable weather also means materials can be stored on-site without concerns about extreme temperature fluctuations or moisture exposure that could affect quality. 2. Preparing for Holiday Entertaining and Winter Comfort Fall renovations provide the perfect timeline for completing kitchen and bathroom projects before the holiday entertaining season begins, ensuring your family can showcase beautiful new spaces when guests arrive for Thanksgiving, Christmas, and New Year celebrations. Kitchen renovations completed in fall allow homeowners to enjoy their new spaces during the season when kitchens see the most use. Holiday cooking and entertaining place significant demands on kitchen functionality, making fall the ideal time to upgrade appliances, increase counter space, and improve storage before the busy holiday season arrives. A newly renovated kitchen not only enhances holiday entertaining but also provides the improved functionality that makes extensive holiday cooking more enjoyable and efficient. Bathroom renovations finished before winter provide immediate comfort benefits during New England’s coldest months. Heated floors, improved lighting, and better ventilation systems installed during fall renovations provide maximum benefit throughout the winter season. Updated bathrooms also ensure that holiday guests experience the comfort and luxury of newly renovated spaces, adding to your home’s appeal during the social season. The psychological benefits of completing renovations before winter cannot be overstated. Having beautiful, functional new spaces ready before the long winter months provides a sense of accomplishment and comfort that enhances the entire winter experience. Families often report that new kitchens and bathrooms make winter months more enjoyable by providing beautiful, comfortable spaces for daily routines and family gatherings. 3. Strategic Advantages of Fall Project Timing Fall renovation timing provides strategic advantages that extend well beyond the immediate project completion, positioning homeowners for maximum enjoyment and investment returns throughout the following year.Cost considerations often favor fall renovations as contractors may offer competitive pricing to fill their schedules before the slower winter months. Material suppliers sometimes provide end-of-season promotions on appliances and fixtures, and the reduced competition for contractor services can result in more favorable project pricing. These potential savings can be substantial, particularly for larger kitchen and bathroom renovation projects.Project completion before winter eliminates the stress and inconvenience of living through renovations during the coldest, darkest months of the year. Fall completion means families can settle into their new spaces and establish comfortable routines before winter weather limits outdoor activities and increases time spent indoors. This timing also avoids the potential complications of winter weather affecting material deliveries or project schedules.Spring market preparation represents another significant advantage of fall renovation timing. Completing major improvements in fall means your home is ready to showcase increased value if you decide to sell during the active spring real estate market. Even if selling isn’t in your immediate plans, having renovations complete positions your home advantageously should circumstances change, while allowing you to enjoy the improvements throughout the winter and spring seasons. 4. Maximizing Your Fall Renovation Investment Strategic planning during fall renovations allows homeowners to incorporate improvements that provide immediate winter comfort while positioning their homes for increased enjoyment and value throughout the following year. Energy efficiency improvements integrated into fall renovations provide immediate benefits as heating season begins. Kitchen renovations
Creating Your Dream Spa Bathroom: Luxury Features That Transform Your Daily Routine
Creating Your Dream Spa Bathroom: Luxury Features That Transform Your Daily Routine Introduction Transform your everyday bathroom into a personal sanctuary where luxury meets functionality, creating a spa-like retreat in your own home. At Golden Hammer Remodeling, we believe your bathroom should be more than just a functional space—it should be your personal escape from the stresses of daily life. In today’s fast-paced world, homeowners throughout Boston, Newton, and Lexington are increasingly seeking ways to bring the luxury spa experience into their homes. A well-designed spa bathroom doesn’t just add value to your property; it transforms your daily routines into moments of relaxation and rejuvenation. From heated floors that welcome your feet on cold New England mornings to rainfall showers that wash away the day’s tensions, the right luxury features can completely revolutionize how you experience your home. Our expertise in creating these tranquil retreats has shown us that the most successful spa bathroom renovations combine thoughtful design with premium materials and cutting-edge technology, resulting in spaces that feel both indulgent and practical for everyday use. 1. The Foundation of Luxury: Premium Materials and Finishes Creating an authentic spa atmosphere begins with selecting materials that evoke tranquility and sophistication while standing up to the demands of daily use. The foundation of any luxury spa bathroom lies in the careful selection of premium materials that not only look stunning but also provide the durability and functionality essential for New England homes. Natural Stone: Timeless Elegance Natural stone remains the gold standard for luxury bathroom design, offering unparalleled beauty and longevity that synthetic materials simply cannot match. At Golden Hammer Remodeling, we frequently recommend Carrara marble for its classic veining and timeless appeal, particularly in traditional New England homes where its elegant patterns complement period architecture beautifully. For homeowners seeking something more dramatic, Calacatta marble provides bold, striking veining that creates a stunning focal point, while travertine offers a warmer, more organic feel that works exceptionally well in spa-inspired designs. The key to successful stone selection lies in understanding how different materials perform in bathroom environments. Marble, while gorgeous, requires proper sealing and maintenance to prevent etching from acidic products. Granite offers superior durability and stain resistance, making it an excellent choice for busy family bathrooms that still demand luxury aesthetics. Quartzite combines the beauty of natural stone with enhanced durability, providing the best of both worlds for homeowners who want stunning visuals without extensive maintenance requirements. Porcelain Perfection Modern porcelain tiles have revolutionized luxury bathroom design, offering the appearance of natural materials with superior performance characteristics. Large-format porcelain slabs can mimic the look of marble, wood, or even concrete, providing endless design possibilities while offering superior water resistance and easier maintenance than their natural counterparts. These materials are particularly well-suited to New England’s climate variations, as they won’t crack or shift with temperature changes like some natural stones might. Hardware and Fixtures The devil is truly in the details when it comes to luxury bathroom hardware. Premium fixtures in finishes like brushed gold, matte black, or polished nickel can elevate even the simplest design schemes. At Golden Hammer Remodeling, we source fixtures from renowned manufacturers who combine aesthetic excellence with engineering precision, ensuring that your beautiful bathroom also functions flawlessly for years to come. 2. The Ultimate Shower Experience: Rainfall and Beyond The shower experience often defines the luxury level of a spa bathroom, and modern shower technology offers incredible opportunities to create truly transformative daily rituals. Gone are the days when a simple showerhead sufficed for luxury bathroom design—today’s spa showers incorporate multiple water delivery systems, temperature controls, and even aromatherapy features to create an immersive sensory experience. Rainfall Showerheads: Nature Indoors Rainfall showerheads have become synonymous with luxury bathroom design, and for good reason. These oversized fixtures, typically measuring 8 to 12 inches in diameter, deliver water in a gentle, enveloping pattern that mimics natural rainfall. The psychological effect is immediate and profound—the wide, soft water coverage creates a sense of being embraced by warm rain, instantly triggering relaxation responses that help wash away stress and tension. When designing rainfall shower systems, positioning is crucial for optimal performance. The showerhead should be mounted directly overhead, typically 7 to 8 feet from the floor, ensuring that users can stand comfortably beneath the water flow without having to crane their necks or adjust their position. For taller family members, we often recommend adjustable mounting systems that can accommodate different heights while maintaining the luxurious overhead experience. Multi-Function Shower Systems The most luxurious spa showers incorporate multiple water delivery methods to create a truly customized experience. Body sprays positioned at various heights along the shower walls provide targeted massage therapy, helping to relieve muscle tension and improve circulation. These systems typically include 4 to 6 spray heads positioned strategically to target the neck, shoulders, back, and legs, creating a full-body hydrotherapy experience that rivals professional spa treatments. Handheld shower wands add versatility to the system, allowing users to direct water exactly where needed for thorough cleansing or targeted relief. Modern handheld units often include multiple spray patterns, from gentle mist to invigorating massage, providing options for different moods and needs throughout the day. Steam Showers: The Ultimate Indulgence Steam showers represent the pinnacle of home spa luxury, transforming your daily shower into a therapeutic steam room experience. These systems generate steam at temperatures between 100 and 120 degrees Fahrenheit, creating a humid environment that offers numerous health benefits including improved circulation, muscle relaxation, and respiratory relief—particularly beneficial during New England’s dry winter months. Installing a steam shower requires careful planning and specialized construction techniques. The shower enclosure must be completely sealed to contain the steam, with sloped ceilings to prevent condensation dripping. Proper ventilation systems are essential to manage humidity levels and prevent moisture damage to surrounding areas. At Golden Hammer Remodeling, we work with certified steam system installers to ensure these complex systems are properly integrated into your home’s existing infrastructure. Digital Controls and Smart Technology Modern shower systems increasingly incorporate digital
Open-Concept Kitchen Remodels: Balancing Flow and Function in New England Homes
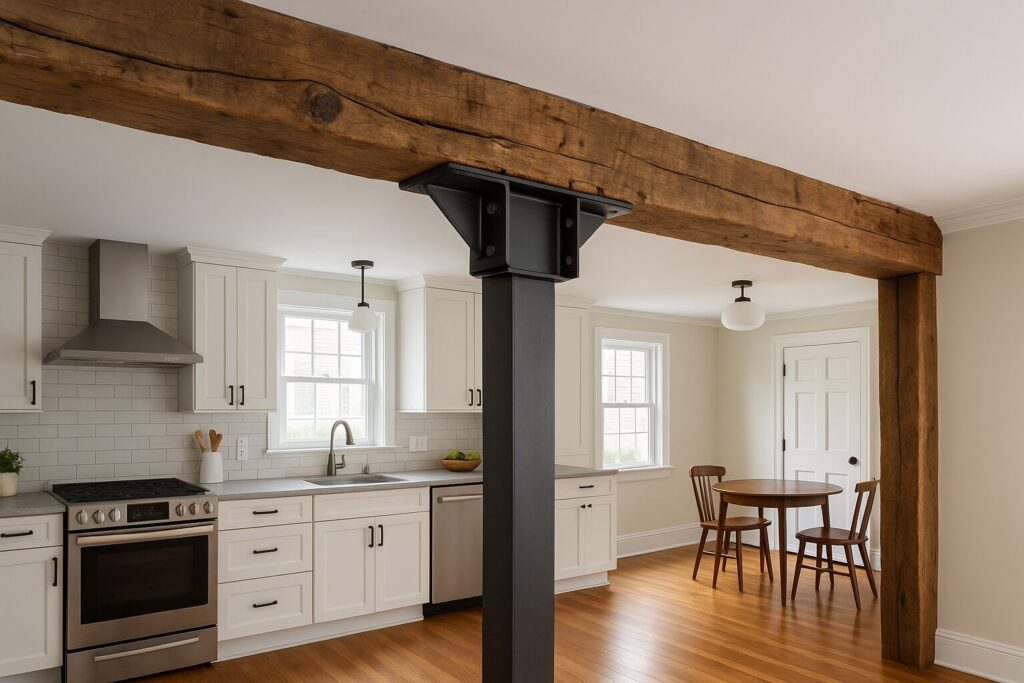
Open-Concept Kitchen Remodels: Balancing Flow and Function in New England Homes Introduction Transform your traditional New England home with an open-concept kitchen that honors architectural heritage while embracing modern living. At Golden Hammer Remodeling, we’ve helped countless homeowners in Lexington, Newton, and throughout the Boston metro area navigate the exciting challenge of creating open-concept kitchens in traditional New England homes. These classic homes, with their compartmentalized layouts and period details, weren’t originally designed for today’s open-living preferences. However, with thoughtful planning and expert execution, we can create flowing, functional spaces that respect your home’s architectural integrity while meeting your family’s modern lifestyle needs. The key lies in understanding how to remove walls safely, maintain structural integrity, and create seamless transitions that feel both spacious and intimate. By carefully balancing period authenticity with contemporary functionality, we create renovations that appeal to today’s buyers while respecting your home’s historic character. Opening up your kitchen isn’t just about removing walls—it’s about reimagining how your family lives, entertains, and connects in your home. When done correctly, an open-concept kitchen becomes the heart of your home, facilitating conversation and connection while maintaining the distinct zones necessary for efficient cooking and comfortable living. 1. Structural Considerations for New England Homes The centerpiece of most aging-in-place bathroom renovations is the conversion from a traditional tub-shower combination to a spacious walk-in shower. This transformation not only eliminates the barrier of stepping over a tub edge but also creates a more open, spa-like atmosphere that enhances the overall bathroom experience. At Golden Hammer Remodeling, we design walk-in showers with zero-threshold entries, allowing for seamless access that accommodates wheelchairs, walkers, or simply provides easier entry for anyone with mobility concerns. The key to successful implementation lies in proper floor preparation and drainage design. We typically install linear drains positioned along the back wall or create subtle floor slopes that direct water efficiently while maintaining a level entry point. Engineering Assessment At Golden Hammer Remodeling, we always begin with a thorough structural assessment by licensed engineers who specialize in historic New England construction. Traditional New England construction often includes center bearing walls that support floor joists above, and removing these walls requires installing beams or other structural supports. Post-and-Beam Advantages Post-and-beam construction, common in older New England homes, actually lends itself well to open-concept renovations. These homes were built with substantial structural timbers that often allow for more flexibility in wall removal than modern stick-frame construction. However, each home is unique, and proper engineering ensures your renovation is both safe and successful. Foundation Considerations Foundation considerations are particularly important in older homes where basement support systems may need modification. We often need to add support posts or modify basement areas to accommodate new structural loads. These modifications can usually be integrated seamlessly into your basement finishing plans. Code Compliance Working with local building codes and permit requirements is essential for open-concept renovations in Massachusetts. Building codes have specific requirements for structural modifications, beam sizing, and support systems. Our experience with local building departments throughout the Boston area ensures smooth permit approval and inspection processes. 2. Creating Defined Zones Within Open Spaces One of the biggest challenges in open-concept design is maintaining functional separation between cooking, dining, and living areas while preserving the sense of openness that makes these layouts so appealing. Successful zone definition requires strategic use of furniture, architectural elements, and design features that create boundaries without walls. Kitchen Islands as Natural Boundaries Kitchen islands serve as natural boundaries between cooking and living spaces while providing additional storage, seating, and work surface. At Golden Hammer Remodeling, we design islands that are proportional to your space—typically 4 to 6 feet long in most New England homes—and position them to facilitate traffic flow while defining the kitchen zone. Key island considerations include: • At least 42 inches of clearance on all sides for comfortable movement • 48 inches preferred for households with multiple cooks • Proportional sizing to the overall space • Strategic positioning to direct traffic flow Ceiling Treatments for Zone Definition Ceiling treatments can subtly define different areas without creating physical barriers: Coffered ceilings over dining areas Exposed beams over kitchens Tray ceilings in living spaces Different ceiling heights to define zones These treatments work particularly well in homes with 9-foot or higher ceilings, common in many New England colonials and Victorians. Flooring Transitions Flooring transitions can also define spaces effectively while maintaining visual flow. Hardwood in living and dining areas with tile or luxury vinyl in the kitchen creates practical boundaries while maintaining visual continuity. We often recommend using complementary materials that share color tones or design elements while serving different functional needs. 3. Maintaining Period Character in Modern Layouts New England homes are beloved for their architectural character, and successful open-concept renovations preserve and celebrate these historic details rather than eliminating them. The challenge lies in integrating period elements with modern functionality in ways that feel authentic and intentional. Preserving Original Millwork Original millwork, including door and window casings, baseboards, and crown molding, should be preserved and extended into newly opened spaces. At Golden Hammer Remodeling, we often salvage original trim pieces and have them replicated by skilled craftsmen to maintain consistency throughout the expanded space. Highlighting Structural Elements Exposed structural elements can become focal points rather than obstacles in open-concept designs: • Original hand-hewn beams • Brick chimneys • Stone foundations • Historic architectural details We often highlight these features with strategic lighting and complementary finishes that celebrate their craftsmanship. Window Configuration Solutions Window configurations in older homes can present challenges in open-concept designs, but they also provide opportunities for creative solutions. Mismatched window heights or styles can be unified through consistent trim treatments or interior shutters that create visual harmony while preserving original openings. Window Configuration Solutions Window configurations in older homes can present challenges in open-concept designs, but they also provide opportunities for creative solutions. Mismatched window heights or styles can be unified through consistent trim treatments or interior shutters that create
Designing an Aging-in-Place Bathroom Without Sacrificing Style
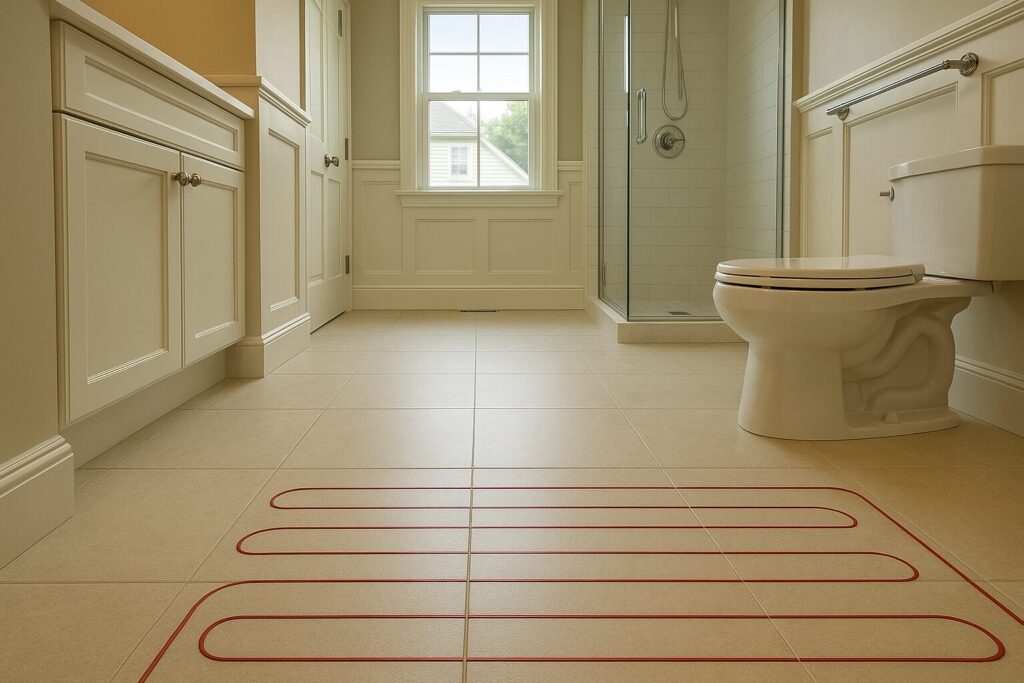
Designing an Aging-in-Place Bathroom Without Sacrificing Style Introduction Create a safe, accessible bathroom that grows with you while maintaining the elegance and sophistication you love. At Golden Hammer Remodeling, we understand that planning for the future doesn’t mean compromising on style today. Throughout Newton, Lexington, and the greater Boston area, we’ve helped homeowners create beautiful, accessible bathrooms that seamlessly blend safety features with sophisticated design. Aging-in-place renovations require thoughtful planning that addresses both current needs and future considerations, ensuring your bathroom remains functional and beautiful for decades to come. The key lies in selecting universal design elements that enhance accessibility while maintaining the aesthetic appeal that makes your home uniquely yours. By incorporating smart design choices and high-quality materials, we create spaces that feel luxurious and welcoming rather than clinical or institutional. Modern aging-in-place design has evolved far beyond grab bars and raised toilet seats. Today’s accessible bathrooms feature elegant solutions that enhance both safety and style, creating spaces that appeal to users of all ages and abilities. When executed properly, these renovations often increase home value while providing peace of mind for the future. 1. No View Out The centerpiece of most aging-in-place bathroom renovations is the conversion from a traditional tub-shower combination to a spacious walk-in shower. This transformation not only eliminates the barrier of stepping over a tub edge but also creates a more open, spa-like atmosphere that enhances the overall bathroom experience. At Golden Hammer Remodeling, we design walk-in showers with zero-threshold entries, allowing for seamless access that accommodates wheelchairs, walkers, or simply provides easier entry for anyone with mobility concerns. The key to successful implementation lies in proper floor preparation and drainage design. We typically install linear drains positioned along the back wall or create subtle floor slopes that direct water efficiently while maintaining a level entry point. Shower Dimensions and Design Shower dimensions play a crucial role in both functionality and aesthetics. We recommend minimum interior dimensions of 36 by 36 inches for basic accessibility, though 42 by 60 inches provides optimal comfort and maneuverability. These larger dimensions allow for: • Built-in seating • Multiple shower heads • Comfortable movement within the space • Dramatic design elements like floor-to-ceiling tile installations • Statement walls that become focal points Material Selection for Safety and Style Material selection significantly impacts both safety and style in walk-in showers. Non-slip porcelain tiles with subtle textures provide excellent traction without appearing institutional. Large-format tiles minimize grout lines, creating cleaner aesthetics while reducing maintenance requirements. Natural stone options like honed marble or textured granite offer luxury appeal with appropriate slip resistance when properly sealed and maintained. Built-In Shower Benches Built-in shower benches serve dual purposes as safety features and design elements. We typically construct these from the same materials as shower walls, creating seamless integration that appears intentional rather than retrofitted. Corner benches maximize space efficiency, while full-width benches along back walls provide more seating area and storage opportunities underneath. Proper height placement at 17 to 19 inches accommodates most users comfortably. 2. Strategic Grab Bar Placement and Stylish Options Gone are the days when grab bars meant unsightly institutional hardware that screamed “medical equipment.” Today’s grab bar options include designer finishes, decorative styles, and integrated solutions that enhance bathroom aesthetics while providing essential safety support. Proper Placement Guidelines Proper grab bar placement requires understanding both building codes and user needs. Key placement guidelines include: Horizontal bars positioned 33 to 36 inches above finished floor level Shower areas with bars on both side walls and back walls Multiple support points for entering, exiting, and maneuvering Toilet areas with bars positioned 12 inches from toilet centerline Extensions 24 inches beyond the front edge of the toilet seat Designer Finishes and Styles At Golden Hammer Remodeling, we source grab bars in finishes that complement existing bathroom hardware, including: • Brushed nickel • Oil-rubbed bronze • Polished chrome • Matte black options Decorative grab bars with curved profiles, textured grips, or integrated towel bar functions blend seamlessly with traditional bathroom accessories. Some manufacturers offer grab bars that double as towel bars, soap dispensers, or even decorative wall elements. Structural Considerations Structural considerations are paramount for grab bar installation. All bars must anchor into solid wood framing or use appropriate blocking installed during construction. We typically install 2×8 or 2×10 blocking between wall studs during the framing phase, ensuring grab bars can support the required 250-pound load capacity. 3. Comfort Height Fixtures and Ergonomic Design Comfort height toilets, also known as ADA-compliant or universal height toilets, represent one of the most impactful aging-in-place upgrades available. These fixtures position the seat 17 to 19 inches above the floor, compared to standard toilets at 15 inches, making sitting and standing significantly easier for users with mobility limitations or joint issues. Universal Appeal The benefits of comfort height toilets extend beyond accessibility considerations. Many users find the taller height more comfortable for daily use, regardless of age or mobility status. This universal appeal makes comfort height toilets an excellent choice for guest bathrooms and powder rooms where diverse users may benefit from the enhanced ergonomics. Wall-Mounted Systems At Golden Hammer Remodeling, we recommend wall-mounted toilet systems for ultimate flexibility in height adjustment and easier floor cleaning. These systems allow precise height customization during installation and create a floating appearance that enhances the sense of space in smaller bathrooms. Vanity Height Considerations Vanity height considerations parallel toilet height adjustments. Standard vanities at 30 to 32 inches often require users to bend uncomfortably, particularly for daily grooming tasks. Comfort height vanities at 34 to 36 inches provide better ergonomics for most users. 4. Lighting Design for Safety and Ambiance Proper lighting becomes increasingly important as we age, with older adults typically requiring two to three times more light than younger individuals to perform the same tasks safely. Aging-in-place bathroom lighting must address both functional needs and aesthetic desires, creating well-lit spaces that remain beautiful and relaxing. Layered Lighting Approach Layered lighting approaches provide the most effective solutions
5 Common Bathroom Design Mistakes to Avoid with Golden Hammer Remodeling
5 Common Bathroom Design Mistakes to Avoid with Golden Hammer Remodeling Get your bathroom right for the long haul by avoiding these common mistakes in layout, shower design, and more. At Golden Hammer Remodeling, we know that remodeling your home is exciting — but with that excitement comes big responsibility. Every design decision should fit your lifestyle, your budget, and your long-term goals. The bathroom is no exception. Today’s bathrooms must be more than just functional; they need to be stylish, efficient, and designed to serve multiple users. Avoid these common bathroom design blunders so you can love your space for years to come. 1. No View Out Nobody wants a dark, stuffy bathroom with poor circulation. When planning your bathroom with Golden Hammer Remodeling, we always recommend locating it on an exterior wall so you can include a window whenever possible. If adding a window isn’t an option, we can install an operable skylight to bring in natural light and fresh air — creating a space that feels bright, open, and comfortable. 2. A Clear View in From Public Rooms Bathrooms should feel private, not exposed. We often see old designs where bathrooms are placed directly off living rooms or dining areas — not ideal when you’re entertaining! At Golden Hammer Remodeling, we plan layouts to avoid direct sightlines from public spaces. Even a simple, small divider wall can provide the privacy you need without sacrificing flow. 3. Making It All About the Toilet The first thing you see in a bathroom should never be the toilet.Whenever possible, we recommend placing the toilet behind a partial wall or even in a separate enclosed space. This not only improves the aesthetics but also allows more than one person to comfortably use the space at the same time.We focus on layouts that make your bathroom more beautiful and more functional. 4. Curbed-Shower Enthusiasm Curbless showers are one of the smartest trends in modern bathroom design.They make small bathrooms feel larger, they’re easier to clean, and they’re safer for aging-in-place homeowners.Golden Hammer Remodeling specializes in creating curbless shower designs that look sleek and meet universal design standards — just let us know at the start of your project so we can plan the floor construction correctly. 5. Thinking Bigger Is Always Better A bigger bathroom isn’t always better — a better-designed bathroom is better. We design bathrooms of every size with smart layouts that make the most of your space. Whether you’re building a luxurious master bath or adding a compact guest bathroom, Golden Hammer Remodeling focuses on efficiency, ease of maintenance, and timeless beauty. Frequently Asked Questions (FAQ)Bathroom Remodeling 1. How can I make my bathroom feel brighter without a window? We recommend installing an operable skylight or using high-quality LED lighting designed to mimic natural daylight. 2. How can I make sure my bathroom feels private? We help design layouts that shield your bathroom from direct views from living or dining areas, using smart walls or small entry corridors when needed. 3. Why should I avoid putting the toilet in direct view? For aesthetic and practical reasons: it maintains a clean, appealing look and improves the functionality for multiple users. 4. What’s a curbless shower, and do I need one? A curbless shower eliminates the step into the shower. It’s modern, safer (especially for aging-in-place), and gives your bathroom a more open, luxurious feel. 5. Do I need a huge bathroom to make it beautiful? Not at all. Smart design beats size every time. We specialize in layouts that maximize comfort, storage, and style no matter how big or small the space is. 6. When should I involve Golden Hammer Remodeling in my project? Ideally, involve us early — even during the vision stage. This way, we can help you avoid costly mistakes and create a design that’s beautiful, functional, and lasting. Blog Looking for more insights? Explore our blog for expert tips, in-depth guides, and the latest trends. Keep discovering more content to help you stay ahead! Bathroom 5 Common Bathroom Design Mistakes to Avoid with Golden Hammer Remodeling May 2, 2025 Bathroom How to Remodel a Bathroom with Golden Hammer Remodeling April 29, 2025 Bathroom Why Spring is the Best Time to Start Your Remodeling Project April 23, 2025 Bathroom Bathroom Remodeling Mistakes That Could Cost You Thousands – Expert Insights from Golden Hammer Remodeling March 26, 2025 Bathroom Top Bathroom Design Trends for 2025 – Expert Insights from Golden Hammer Remodeling March 13, 2025